Installation Position and Contact Angle Determine Belt Cleaner Performance
Poor cleaning performance is not always caused by the belt cleaner itself. Even when the correct cleaner has been selected, its effectiveness still depends on proper installation conditions, including the mounting position, blade angle, and available maintenance space.
An installation error of just a few centimeters can change the blade angle and contact pressure against the belt, gradually leading to poor cleaning, material buildup, or abnormal blade wear.
When carryback persists, checking the cleaner model and specifications alone is not enough. It is equally important to determine whether the blade is positioned correctly and maintaining stable contact with the belt at the proper angle.

The Core Pain Point:Proper Installation Is More Than Fit
A belt cleaner must do more than simply fit into the available space. It needs to contact the belt at the correct position while remaining clear of the material discharge trajectory.
If a primary belt cleaner is installed directly beneath the material trajectory, the blade may be exposed to direct impact from discharged material. This places additional loads on components designed to remove carryback, potentially causing material buildup, blockages, abnormal blade wear, and even structural deformation over time.
• Installation Errors Can Affect Cleaning Efficiency
For a primary belt cleaner, the mounting shaft must be positioned according to the specified installation reference relative to the pulley wrap. If the shaft is installed away from the correct reference position, the blade angle will also change. An insufficient angle may cause the blade to flip over or wear prematurely. Correct positioning helps maintain a proper blade angle and stable contact pressure against the belt.
• Keep the Cleaner Outside the Material Discharge Trajectory
A primary belt cleaner installed directly beneath the discharge stream may continuously experience impact loads in directions it was not designed to withstand.
Over time, this can lead to material buildup, clogging, accelerated blade wear, and potentially damage to the cleaner structure. The cleaner should therefore be positioned outside the direct material trajectory rather than used as a barrier against discharged material.

• Blade Angle Determines Scraping Efficiency
The blade angle has a direct effect on cleaning efficiency.
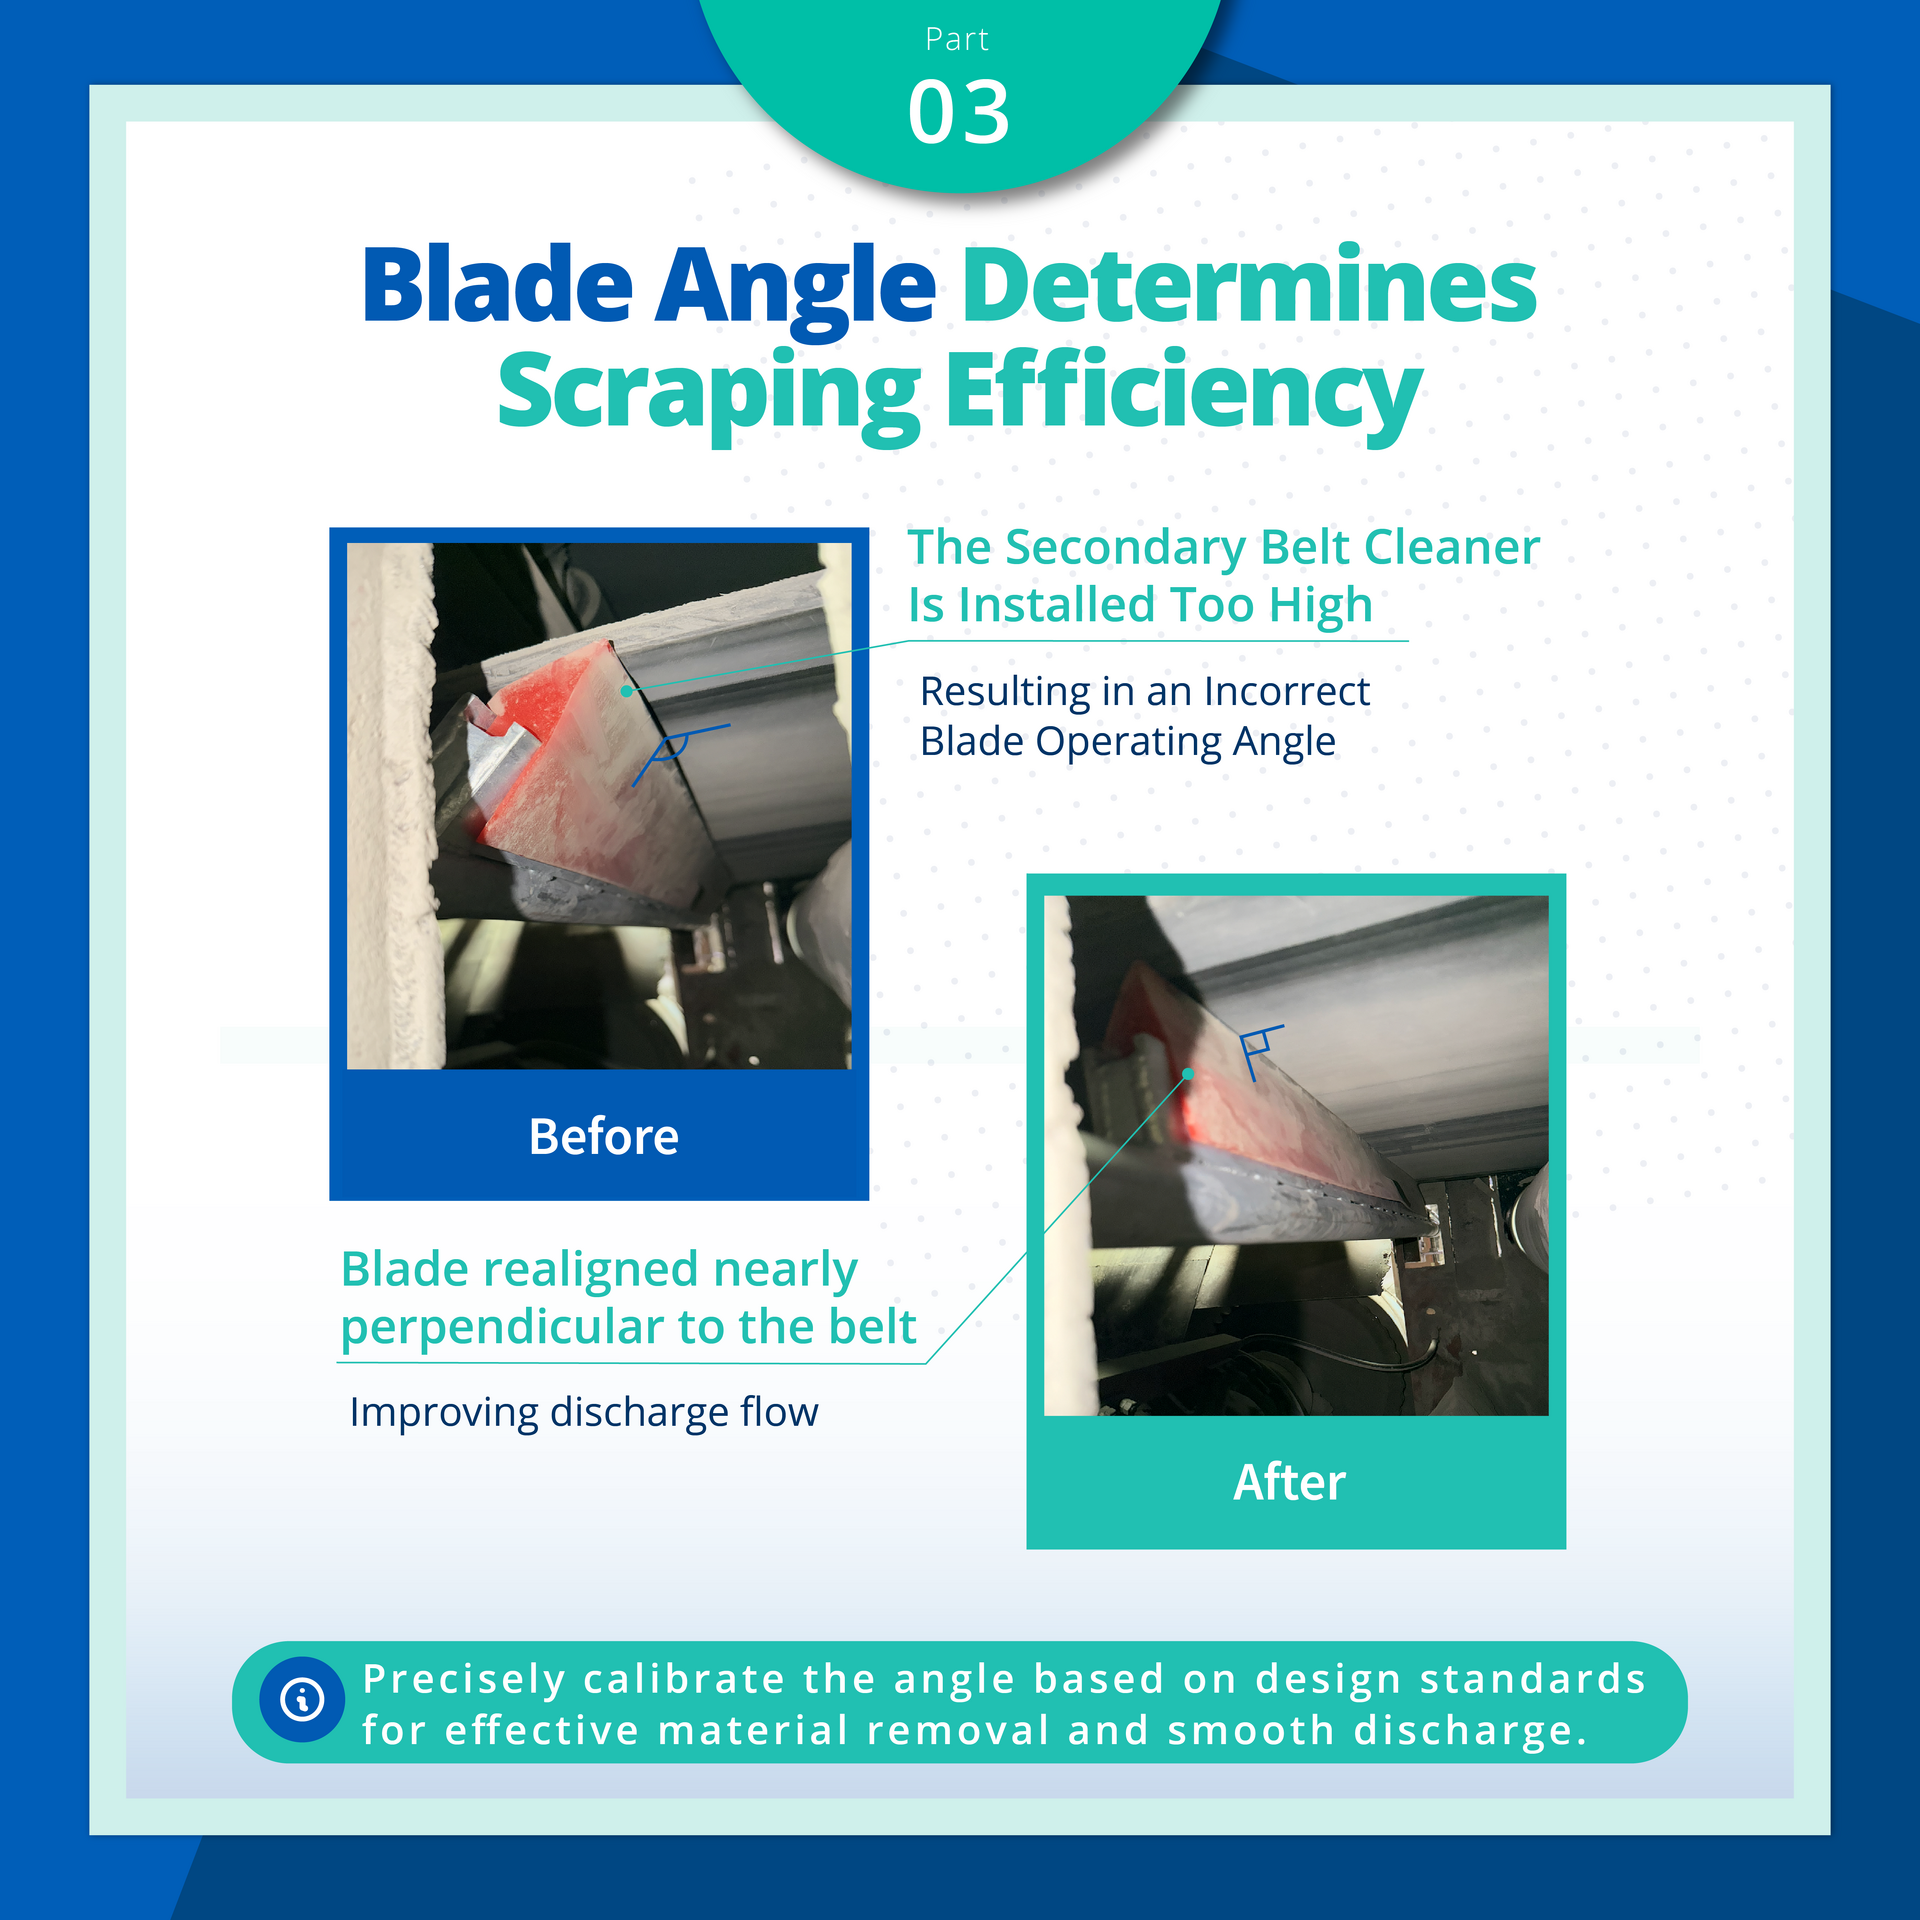
When the angle meets the specified design requirements, carryback can be effectively removed from the belt and discharged smoothly along the blade. If the angle is incorrect, the blade may begin to block the material instead of scraping it away, creating a new buildup point in front of the blade holder.
The installation height of a secondary belt cleaner can also affect its blade angle. In the example shown, the cleaner was initially mounted too high, causing the blade to contact the belt at an improper angle. After repositioning the cleaner so that the blade was closer to perpendicular to the belt, material discharge improved.
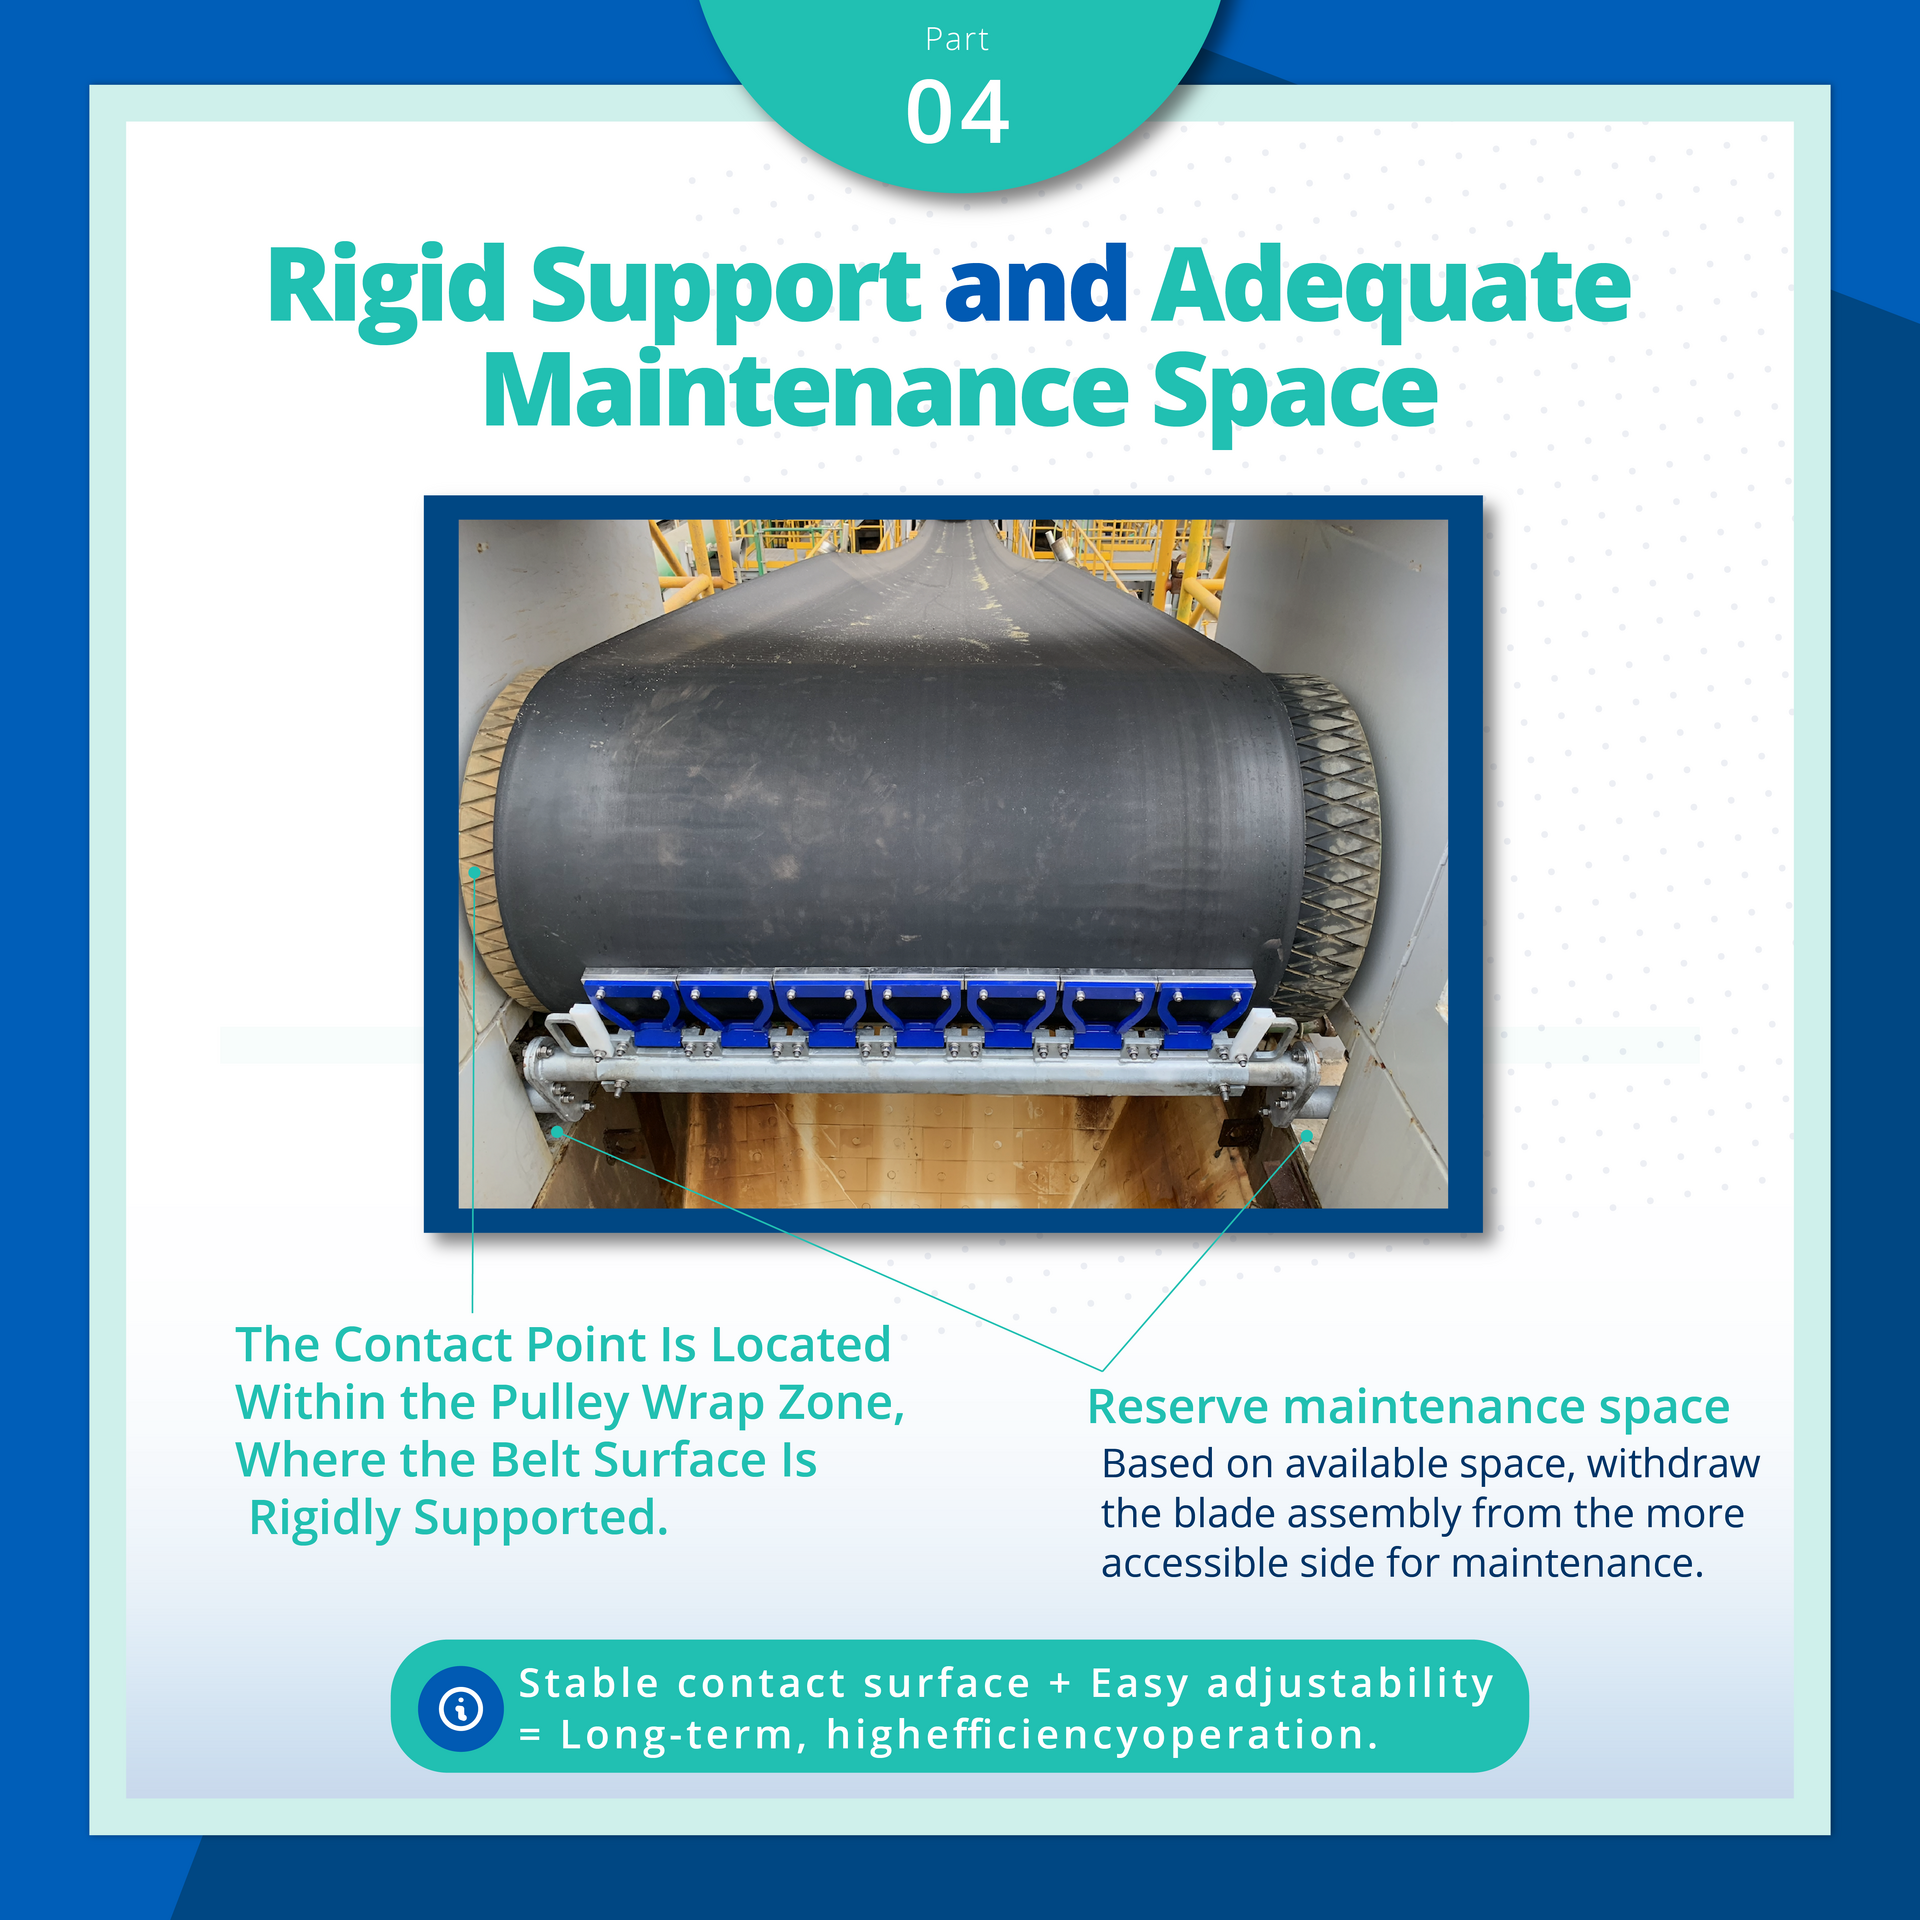
Maintenance Space and Structural Support Also Matter. The area around the head pulley is often restricted by equipment layout, walkways, or accumulated material. A belt cleaner may physically fit into the available space, but that does not mean it can be properly maintained.
Cleaner blades wear naturally during operation, while tension settings also change over time. Sufficient working space is therefore required for blade replacement, tension adjustment, and routine inspection. Without adequate access, it becomes difficult to maintain the intended blade-to-belt contact as operating conditions change.
The mounting point must also provide stable support. Excessive belt vibration can cause constant changes in the contact between the blade and the belt. The head pulley area generally provides a more stable belt surface because the belt is supported by the rigid pulley, making it a suitable location for the primary belt cleaner.
Solution: What Should I Check When Cleaning Performance Declines?
• Check the Installation Reference
Verify the relative position between the mounting shaft and the pulley, and compare it with the manufacturer’s specified installation reference.
If blade flipping, uneven wear, inconsistent contact, or material buildup in front of the blade holder is already occurring, check the installation height and actual blade angle as well. These symptoms may indicate that the cleaner has shifted away from its intended position.
• Observe the Actual Material Trajectory
The cleaner position should not be determined solely by the available installation space.
Observe the direction and range of material discharge from the head pulley while the conveyor is operating. Make sure the primary cleaner is outside the direct impact zone and that the belt around the cleaning point has sufficient structural support.
• Confirm Maintenance Accessibility
Make sure the blade assembly can be removed without obstruction, the tensioning system has enough room for adjustment, and routine inspection points can be accessed easily. If sufficient maintenance space is not considered during installation, blade wear or changes in tension may be difficult to correct later.
These three checks cover the essential operating conditions of a belt cleaner:
accurate positioning, protection from unnecessary external loads, and sufficient room for adjustment as the blade wears.
When carryback, material buildup, or abnormal blade wear occurs, checking the installation reference, actual material trajectory, and maintenance conditions can help identify which factor is disrupting proper blade-to-belt contact.
Correcting that condition is often more effective than repeatedly increasing blade pressure or replacing components.